Basic dyeing step by step.
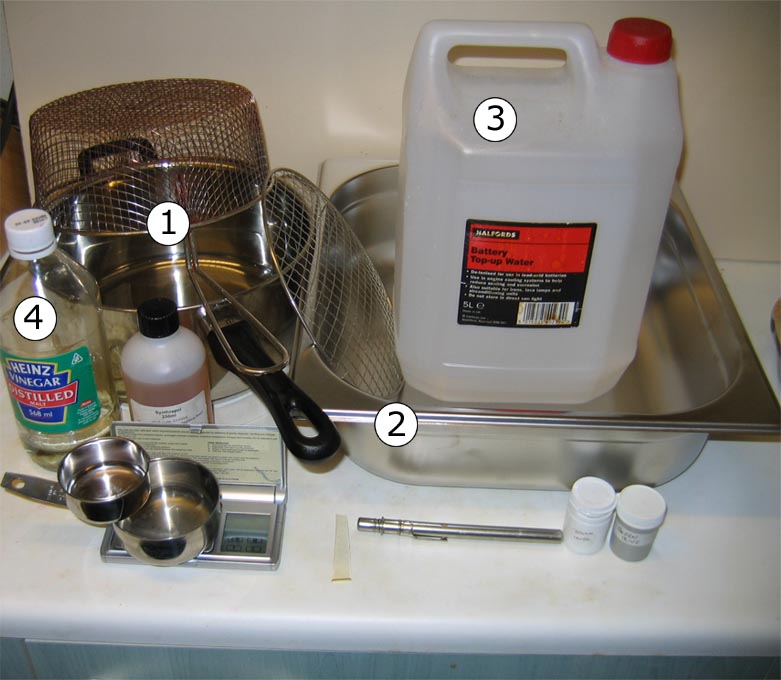 |
You will need.
|
 |
|
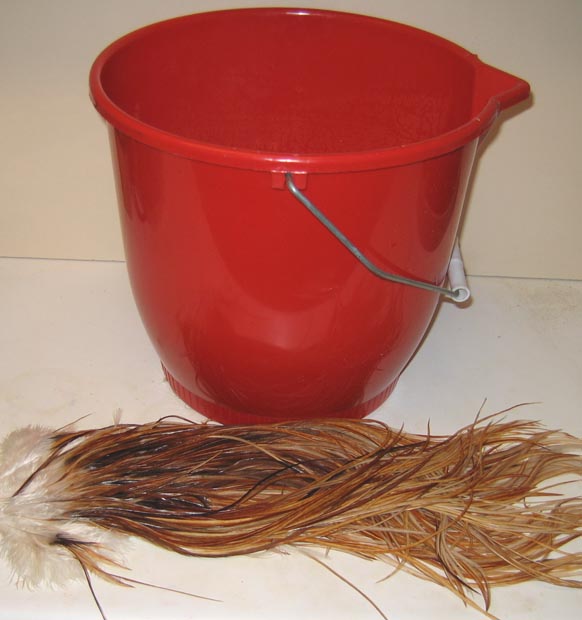
A bucket and of course, a cape or saddle. |
 |
Step1.Fill your bucket with enough hot (not boiling) water to fully cover the material, add around 1 teaspoon of degreaser and stir gently. Add the cape/saddle. This should be left for a day to soak and to let the degreaser work. If the material is exceptionally dirty of greasy, drain and refill the bucket and repeat. |
Step2.Fill your pan, put it on the hob and turn the heat up. Whilst waiting for it to boil go to.. |
Step3.Rinse all the degreasing solution out of your material with cold water. Once you're sure all traces of the degreasing solution are gone fill the sink with hot (not boiling) water and pop the material in. This brings the material back up to a temperature compatible with the dye bath. 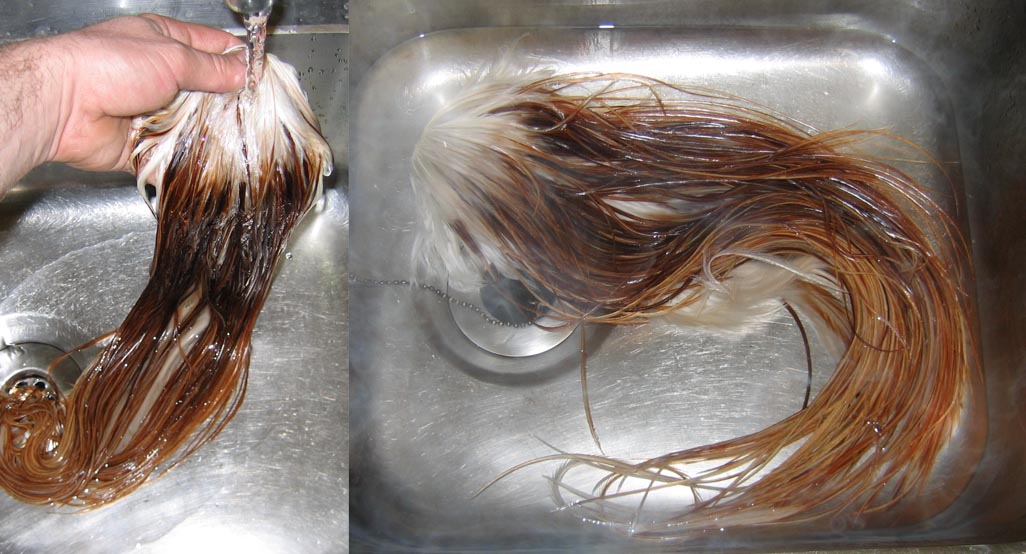 |
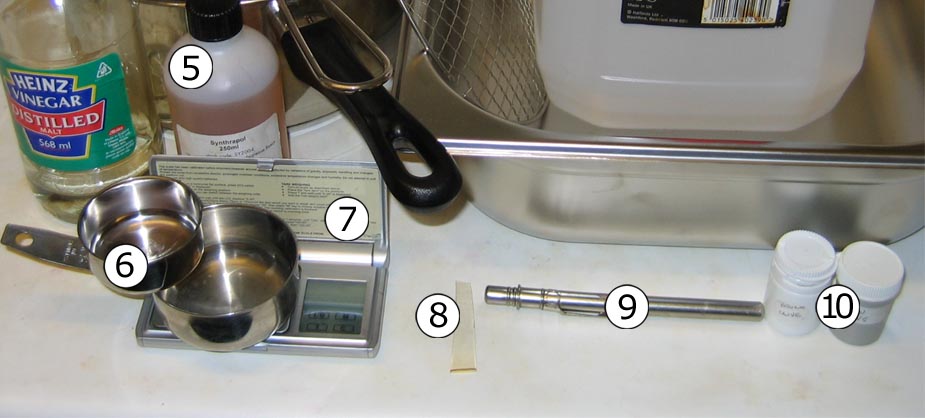
Step4.Again, whilst waiting for the water to get to the right temperature you can weigh out your dye powder and get your vinegar or acetic acid ready. After weighing your dye and preparing your vinegar find a stop watch (most mobile phones have one built in) and your thermometer. 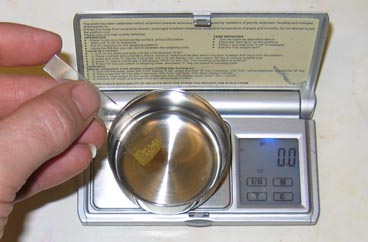  |
Step5.By now the water in the pan should be getting pretty hot so it's time to add your dye powder. Once it's in the pan give it a good stir to make sure it's compleatly dissolved. Once you're sure the dye powder has dissolved add your vinegar (2 or 3 tablespoons full will usually be enough) and check the temperature of the dye solution, it should be between 170 - 180° Fahrenheit, 77 - 82°Celsius. Some shades take better at higher temperatures but great care should be taken in order that the material being dyed doesn't suffer heat damage. 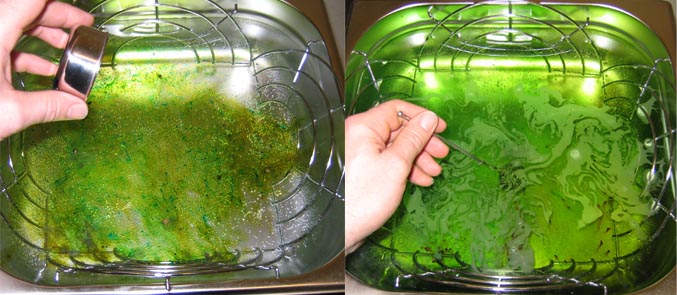 |
Step6.Add your material, make sure it's submerged and start your stop watch. Now start to gently agitate the material to allow the dye to penetrate everywhere. This also stops the material from making a lasting contact with the sides of the pan where singeing could occur. 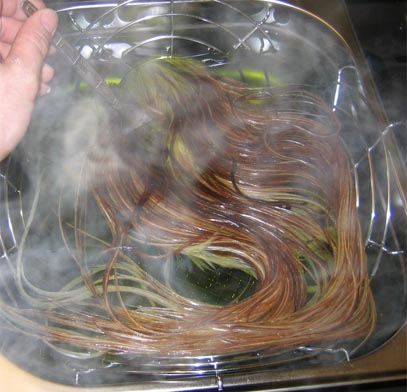 You should allow the material to become a shade or two darker than required as it'll get lighter during the drying process. When dying feathers, capes or saddles I always keep a "test feather" loose in the pan that I can periodically remove and hold against the light to check for the effect of transmitted light on the shade of the material. I believe the transmitted light shade is easily as important as the reflected light shade when it comes to the effectiveness of the end product. |
Step7.Once you're happy with the shade, stop your stop watch and remove the material from the dye bath. Run it under the cold tap to remove immediate excess dye solution. 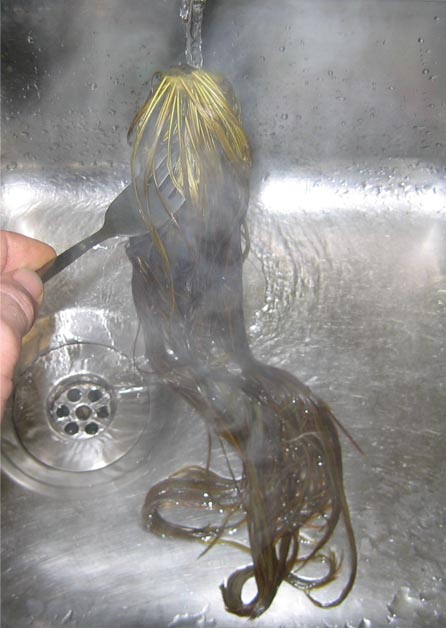 You should then fill the sink with enough cold water to immerse the material and let it sit in the sink for about an hour. This will finish the fixing process and allow any excess dye to leech out. 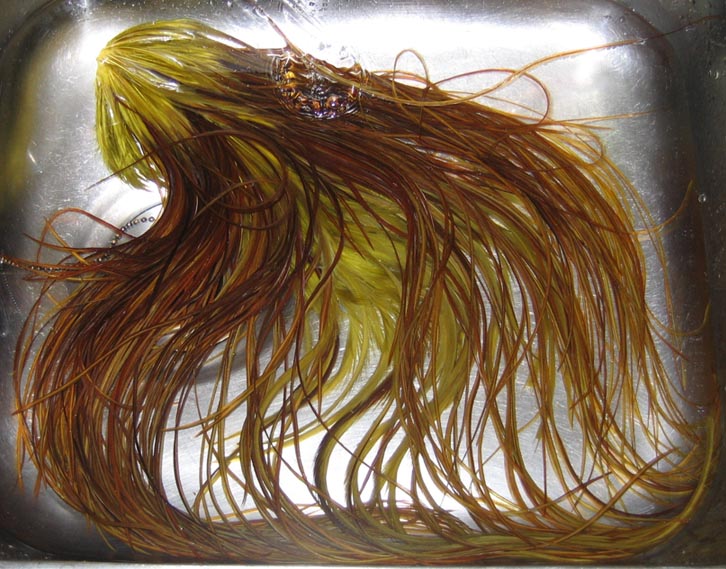 |
Step8.Once you're happy that all excess dye has been removed you should then get your bucket and, where capes or saddles are involved, attach them to the inside of the bucket by means of a clothes peg in order for it to drip dry. If you're dying a number of capes you might find it usefull to rig up a mini washing line and hang the capes up with a drip tray underneath. I prefer the bucket as I can sit it out of harms way. With other loose materials such as feathers or Seals fur you can simply put them in a couple of pieces of kitchen roll to soak up excess water and allow them to dry naturally at room temperature. 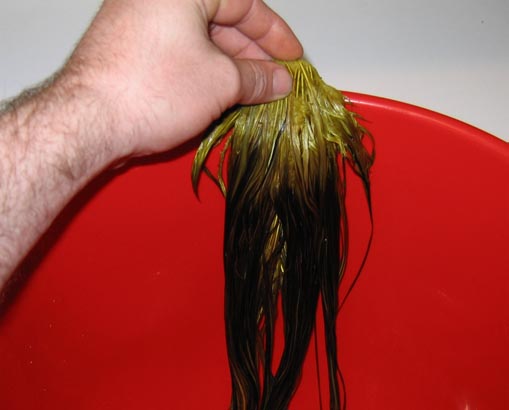 |
Step9.Once the material is merely damp rather than soaking you can then place it between a mixture of newspaper and kitchen roll. 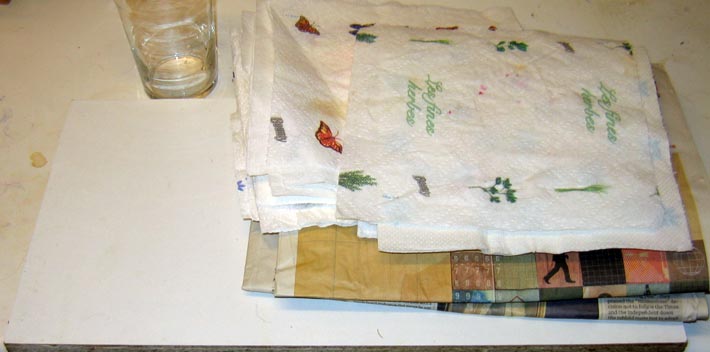 Firstly place a few sheets of newspaper on a board or similar flat surface. Then place the kitchen roll on top of the newspaper. In the case of capes and saddles you should then straighten out the feathers so that they lie neatly and then cover them with a layer of kitchen roll and a further layer of newspaper. The same method can be used for skins such as Deer or Rabbit. Make sure the hair fibres are neatly combed using an old hair brush so that they sit correctly before compression. 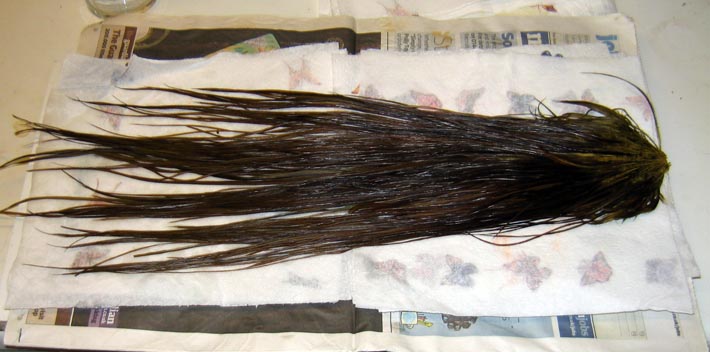 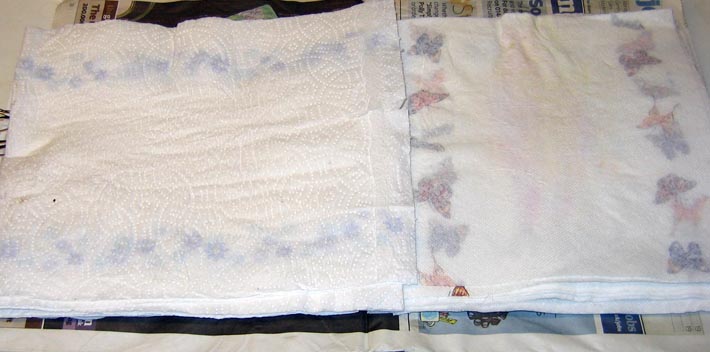 Finally cover the newspaper with large, and more importanly, heavy books to compress the material between the layers of paper. The alternative would be to put another board on top of the newspaper and pop a couple of bricks on top. You should leave the material in the compress for a few hours, this will soak up most of the remaining liquid. 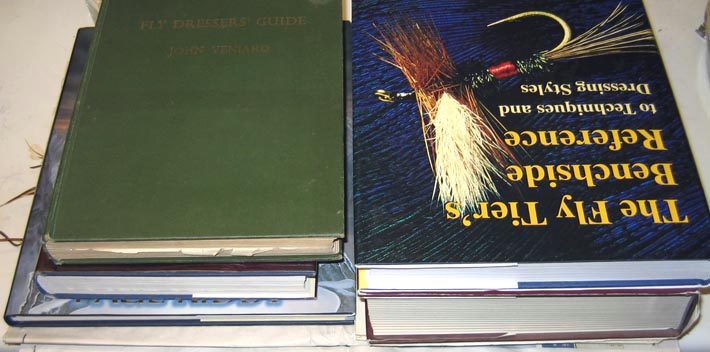 |
Step10.Once the majority of the excess liquid has been soaked up by the compress, remove the material and then brush a mix of 50/50 glycerine and surgical spirit into the back of the skin. 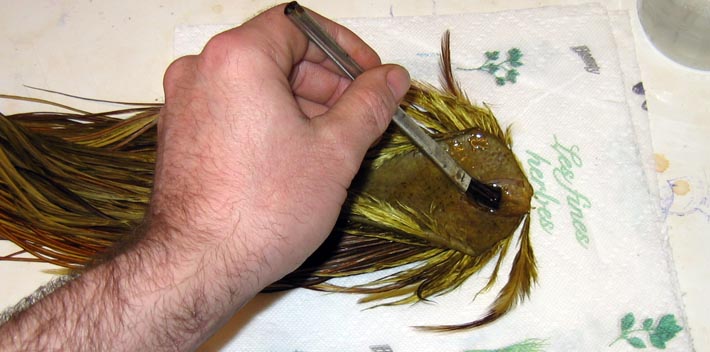 This will help to keep the skin supple (for a time) rather than dry and likely to crack. Finally, dry capes or saddles with a hair dryer at a low/medium heat setting. For fur pelts, you should allow them to dry naturally at room temperature. This can take a considerable amount of time, weeks in the case of Deer hair The finished article.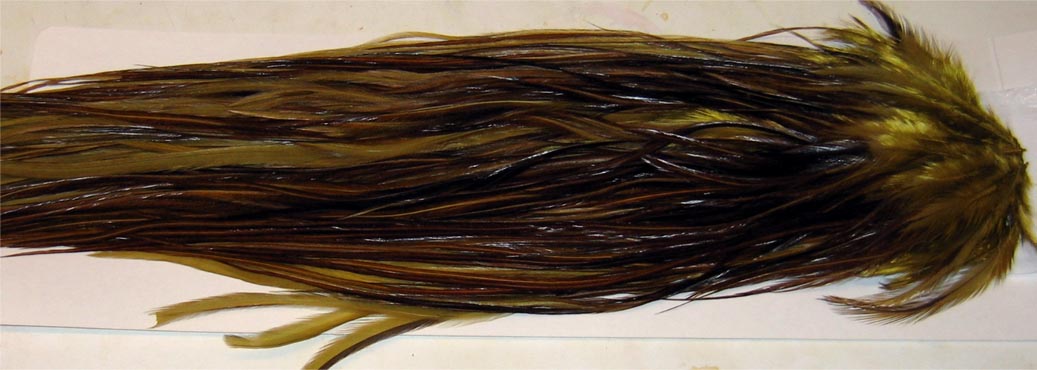 This cape looks like a medium shading to very dark brown olive by reflected light. However, by transmitted light it looks a rich golden brown olive. |
The importance of notation.The importance of good note keeping can't be stressed highly enough. Keeping accurate notes helps to maintain consistency. There are five main variables when it comes to dying.
In order to achieve consistent results you should keep accurate notes of the above and make up a "recipe book" for future reference. The recipe for the above saddle is as follows:
This might seem like huge amount of dye but it must be remembered that a) it is a large saddle and b) the skin patch soaks up a considerable quantity of dye. |
Additional notes.When it comes to dying natural colours and shades on to capes and saddles I prefer to use naturally coloured materials such as ginger or brown. Cream is only used where bright colours such as hot orange or sunburst yellow are required. The reason for this is that in nature there is no such thing as a solid colour. I've yet to find an insect that is one pure shade of green from head to tail and so the naturally coloured base material helps to achieve a small variation of shades within a given range depending on the quantity and shade of dye used. Here's a list of natural base cape/saddle colours I use for different shades.
Some excellent natural shades can be had by dying on to grizzly, grizzly variant and barred ginger. |
|
It seems there are one or two misconceptions about dyeing. Material which is dyed, actually takes on the dye itself, which when properly done, bonds to the material also making it colour fast. The liquid in which the dye and the material is placed, is merely a transport medium to ensure even dyeing. |